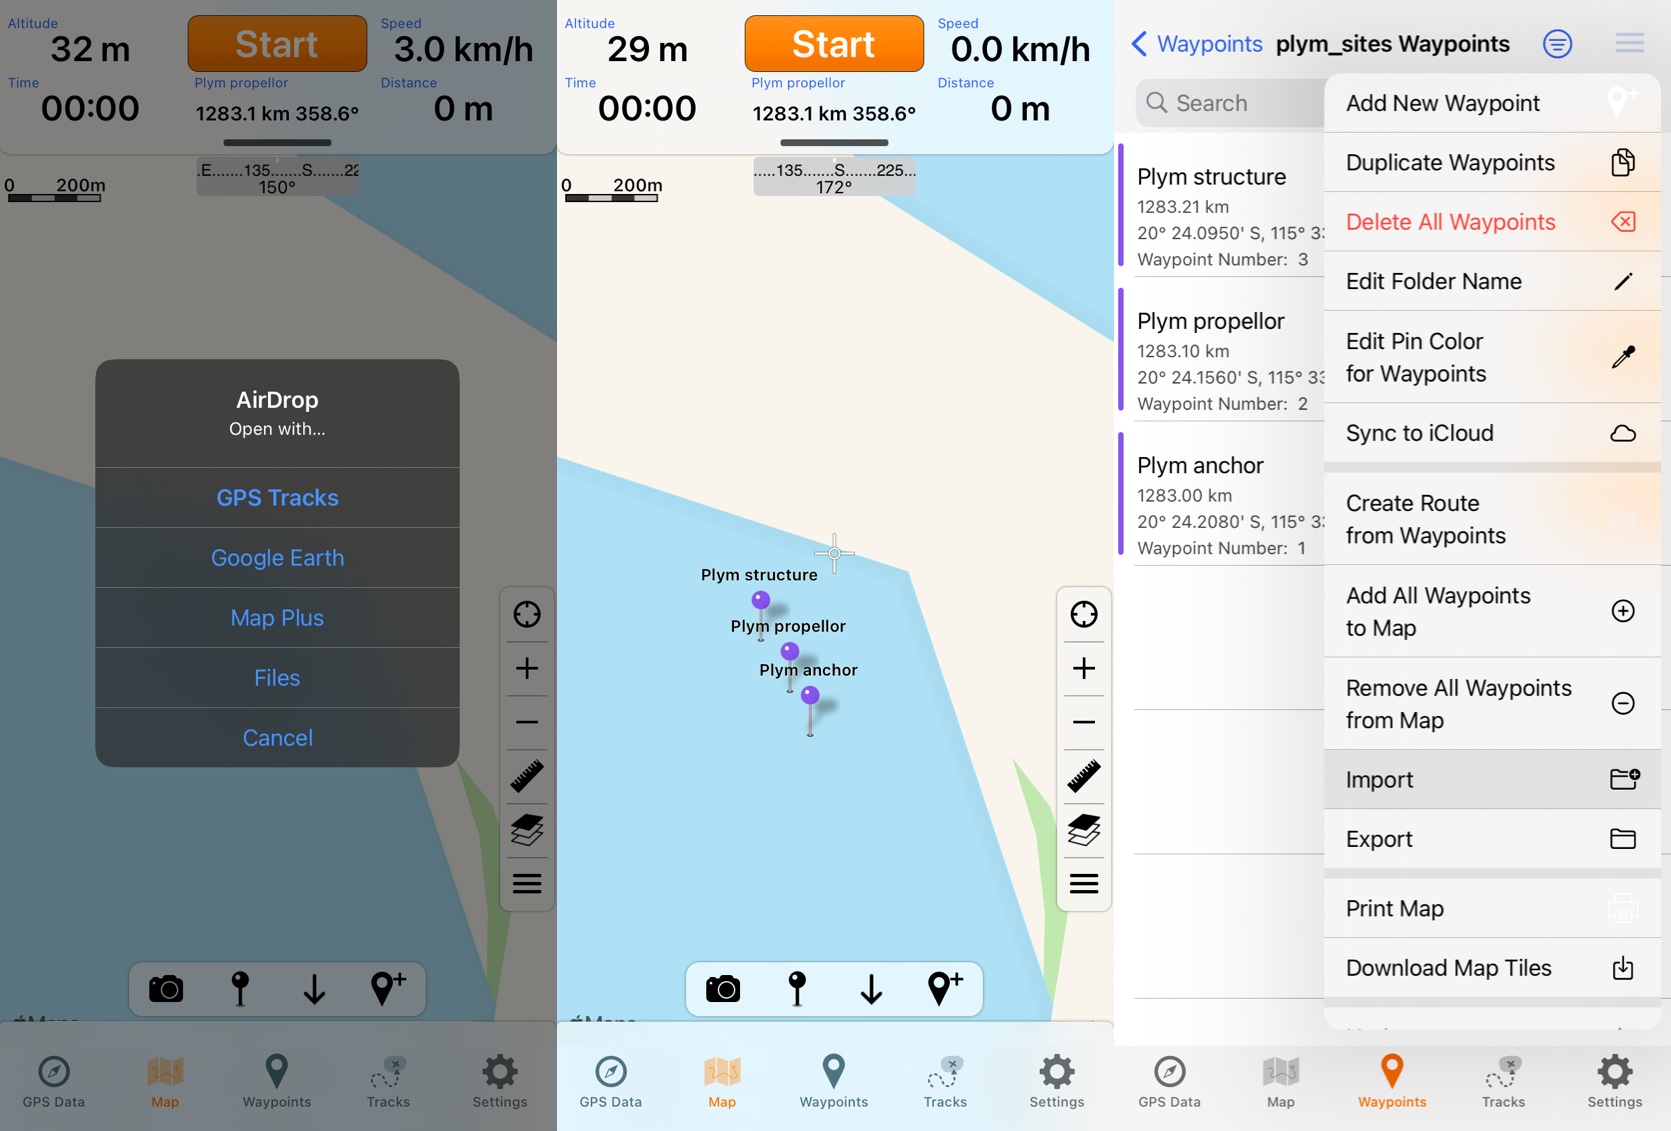
GPS Tracks app
The GPS Tracks app (AUD $5.99) is the most suitable iPhone app I have tested for basic archaeological GIS. There are more powerful options, but it’s easy to use and doesn’t cost too much. Importing this data onto your iPhone is simple, there are several ways described in the manual. Those with Macs can AirDrop a *.kml or*.kmz right into GPS Tracks.
To import data into GPS Tracks, we need to get it into a file type GPS Tracks understands. The most convenient is *.kml or*.kmz files. For points and lines, this is as simple as exporting them as *.kml files from QGIS. For aerial images and historical maps, we need to convert it first to georeferenced *.tif format, then to *.kmz using Google Earth.
In this example, we will prepare map data for fieldwork on atomic testing sites the Montebello Islands, Western Australia.
This will use:
Coordinates of known features
aerial imagery and,
historical maps
Preparing your data
QGIS is a a free and open source GIS software. It shares the position as industry standard which the much for expensive ArcGIS. They are each slightly better at different things, but a general user will not be limited by either. QGIS is cross-platform, but ArcGIS only supports Windows.
Vector data
Step 1. Make a *.csv
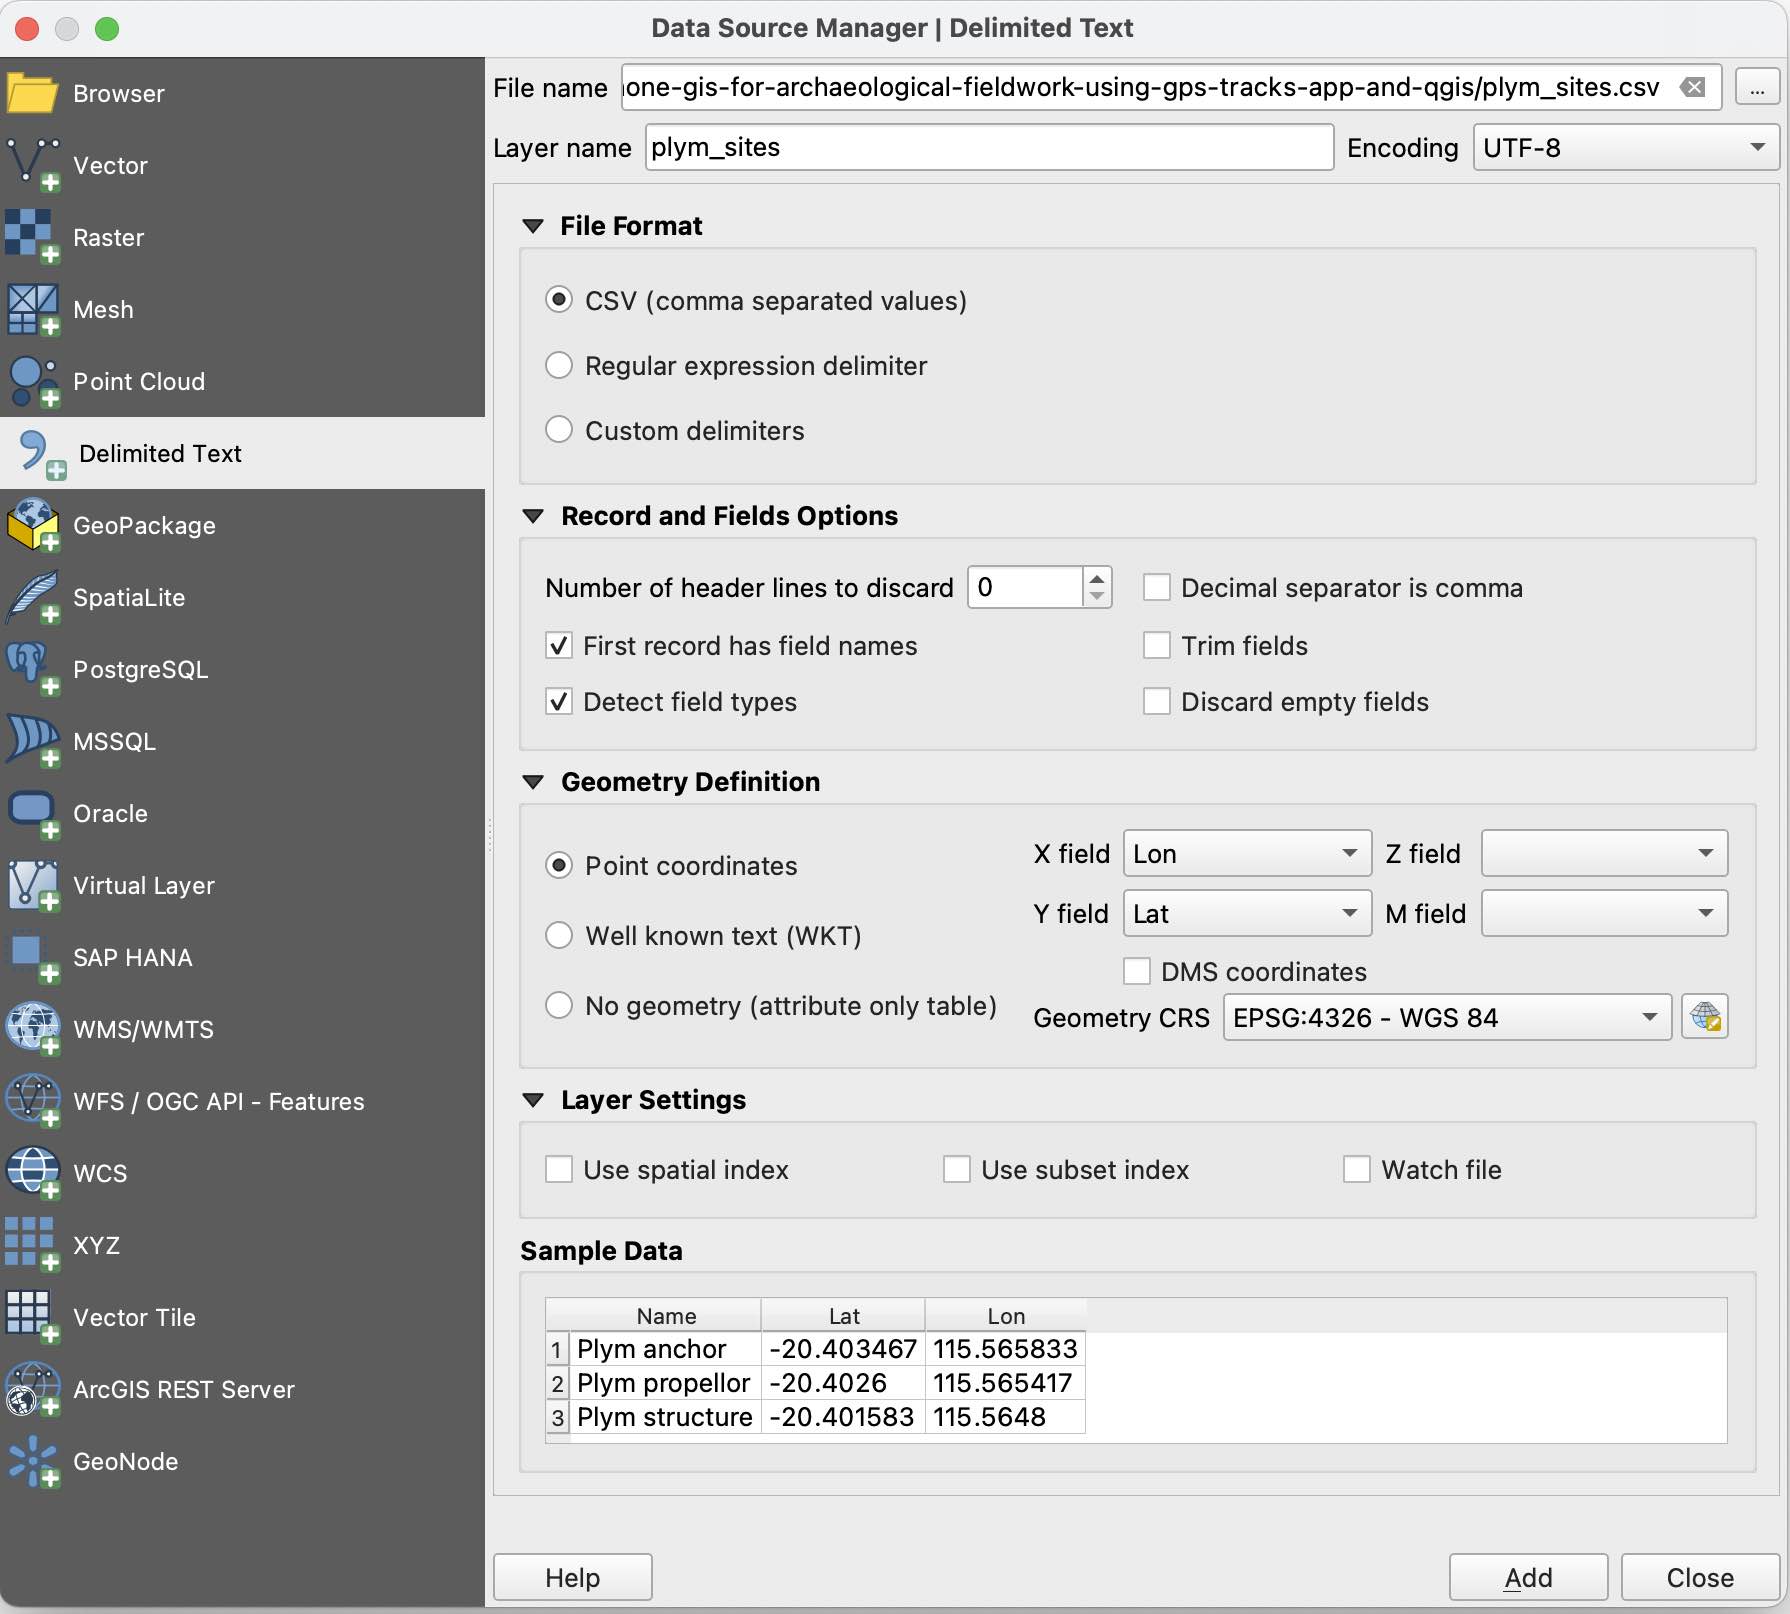
QGIS can import a spreadsheet of coordinates, which can be useful for relocating known sites. Looking at the WA Museum Shipwrecks Database entry for HMS Plym, we can see some interesting underwater features listed. These can be placed in a spreadsheet using Excel or Numbers, using decimal degrees. This is then exported as a *.csv. It should look something like this:
| Name | Lat | Lon |
|---|---|---|
| Plym anchor | -20.40347 | 115.5658 |
| Plym propellor | -20.40260 | 115.5654 |
| Plym structure | -20.40158 | 115.5648 |
Step 2. Import *.csv into QGIS
In the Layers menu at the top of the screen, go to Add Layer -> Add Delimited Text Layer. Select your file, and it should figure out X is Lon, and Y is Lat. If you know the CRS, this is important, but for this dataset we can only presume it is in the most common, EPSG:4326 - WGS 84. Be careful, if you choose wrong it can be many meters out!
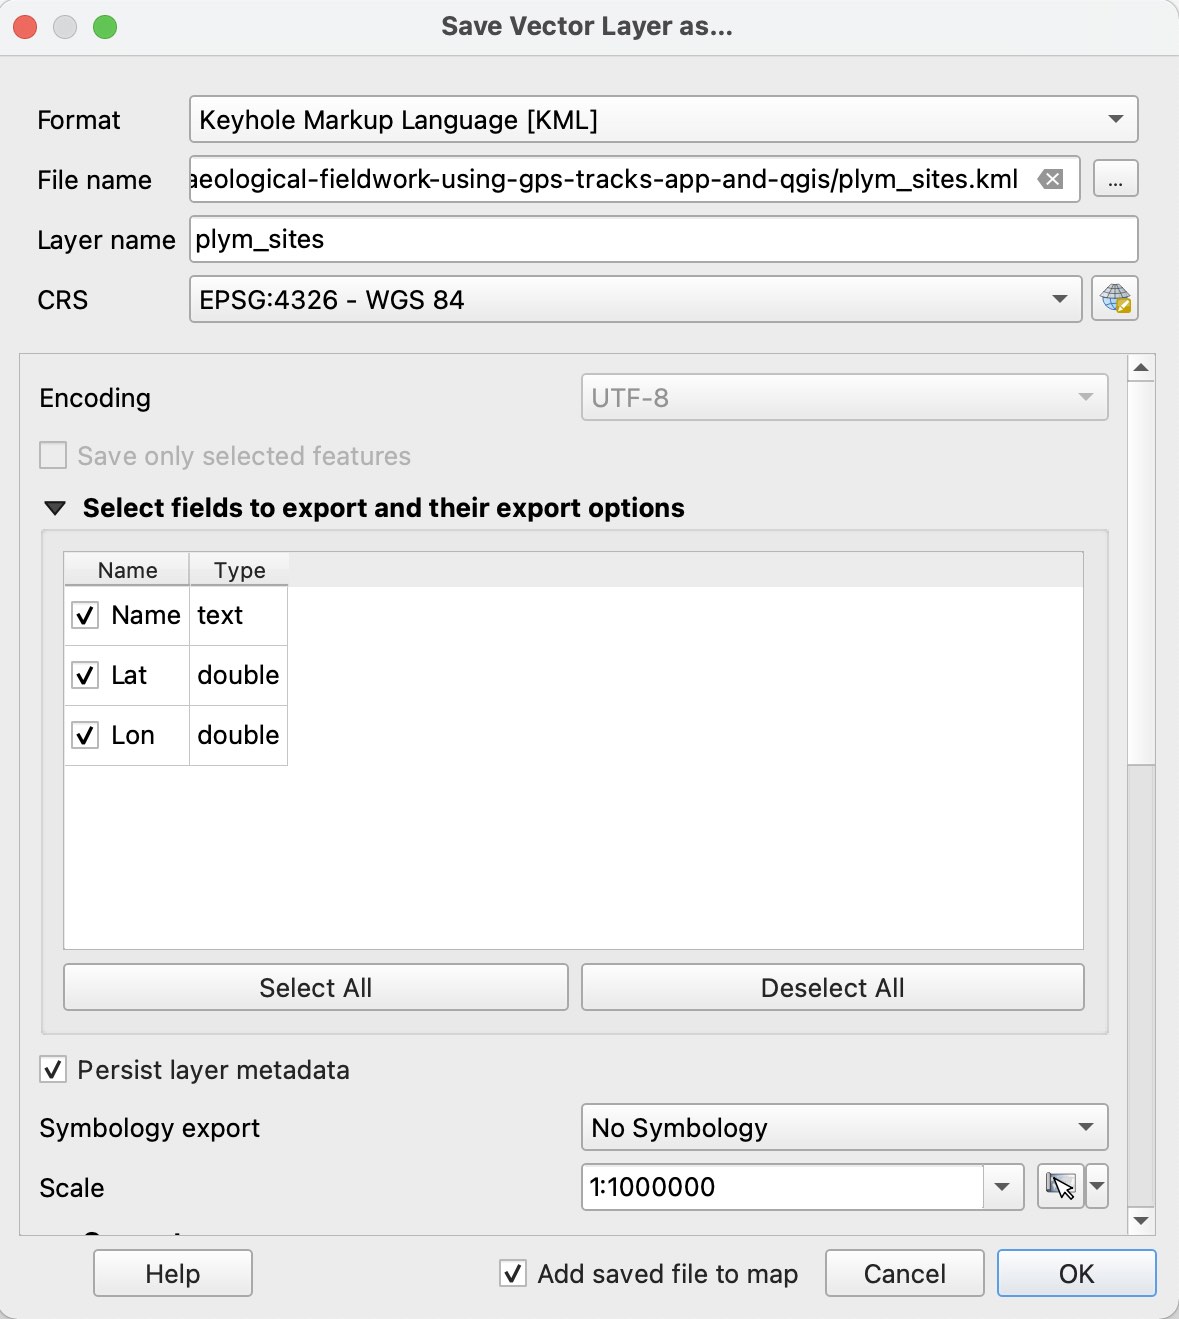
Step 3. Convert it to a *.kml
Now you have to save it as a *.kml file. In the lower left hand Layers pane, right click on the layer and select Export -> Save feature as. Selected ‘Keyhole Markup Language’ in the format, choose where to save it and and keep the rest as default. Here is the result.

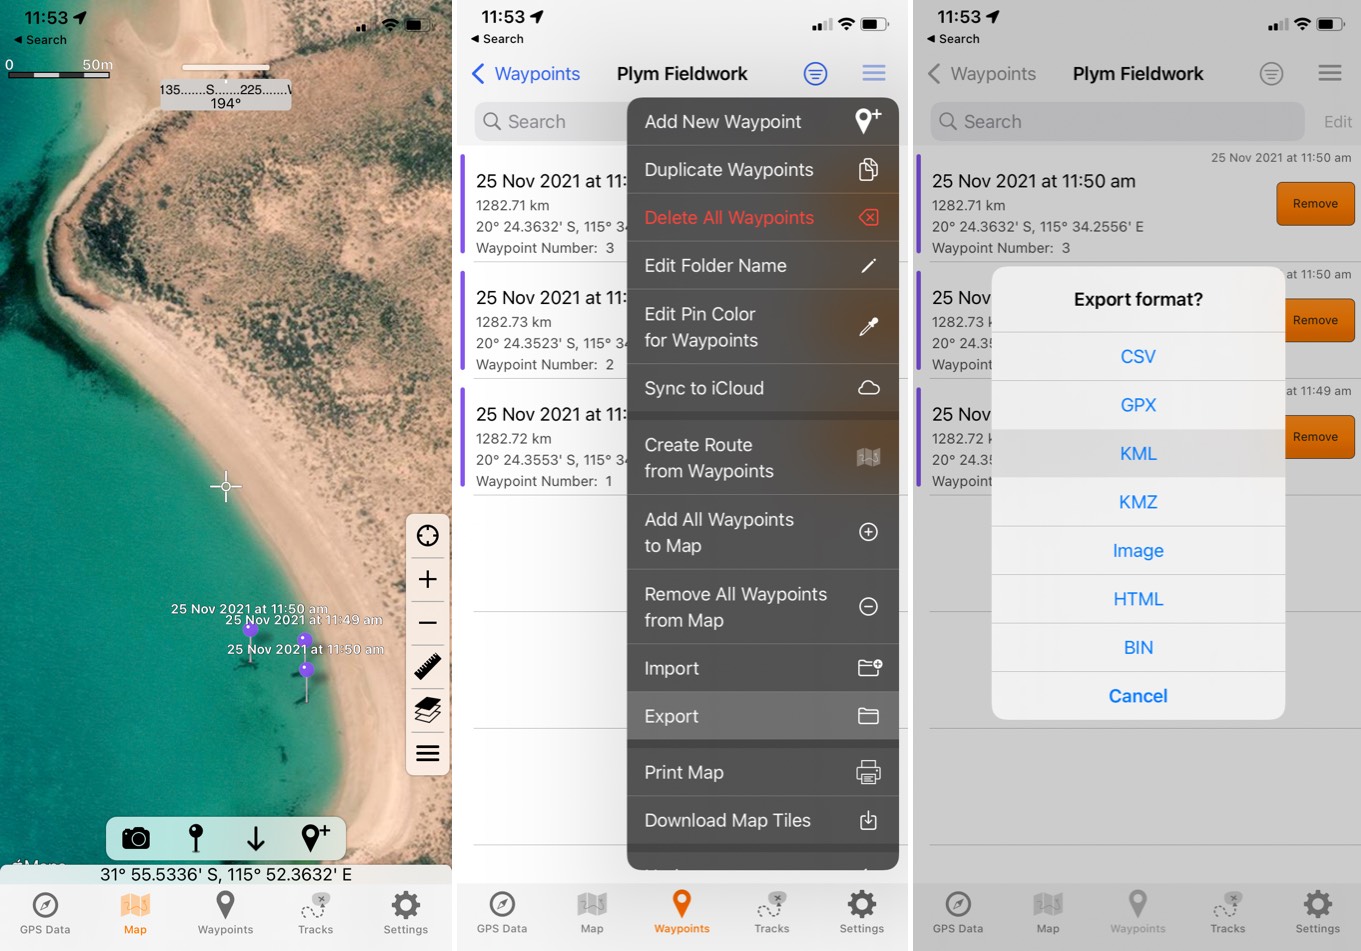
Importing this data onto your iPhone is simple, there are several ways described in the manual. With GPS Tracks open on your iPhone, find the file on your Mac and AirDrop it. It should give you the option to open directly in the app. If it doesn’t, then save it to Files, then use the Import option in the top right of the waypoints page. Otherwise, you can email the file to yourself, and open it in GPS Tracks there.
Raster data
To get images (raster) data into GPS track, it needs to be georeferenced, then saved as a *.kmz. The workflow is similar for aerial imagery or historical maps - you just need to turn them into a geotiff.
Aerial imagery
Step 1. Load a basemap
If you have a basemap already as a geotiff or similar, drop it into the main canvas. Otherwise, you can add some freely available imagery, such as ESRI’s World Imagery. Right click on XYZ tiles in the browser to the right, and select ‘New Connection…’. Enter a name, and your imagery provider URL:
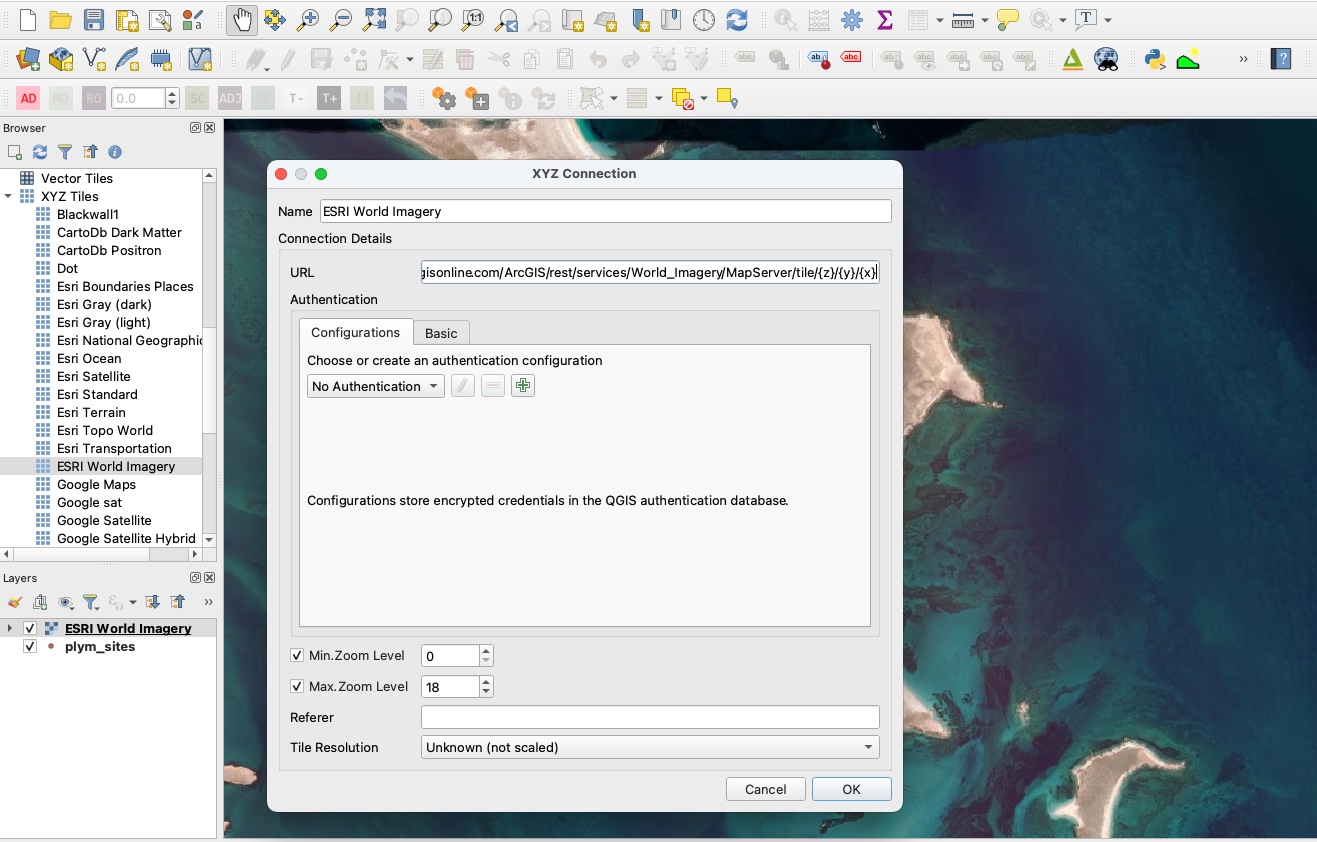
Alternatively, you can add many popular ones in one go using this script in the Python console (recommended): https://gis.stackexchange.com/a/356668
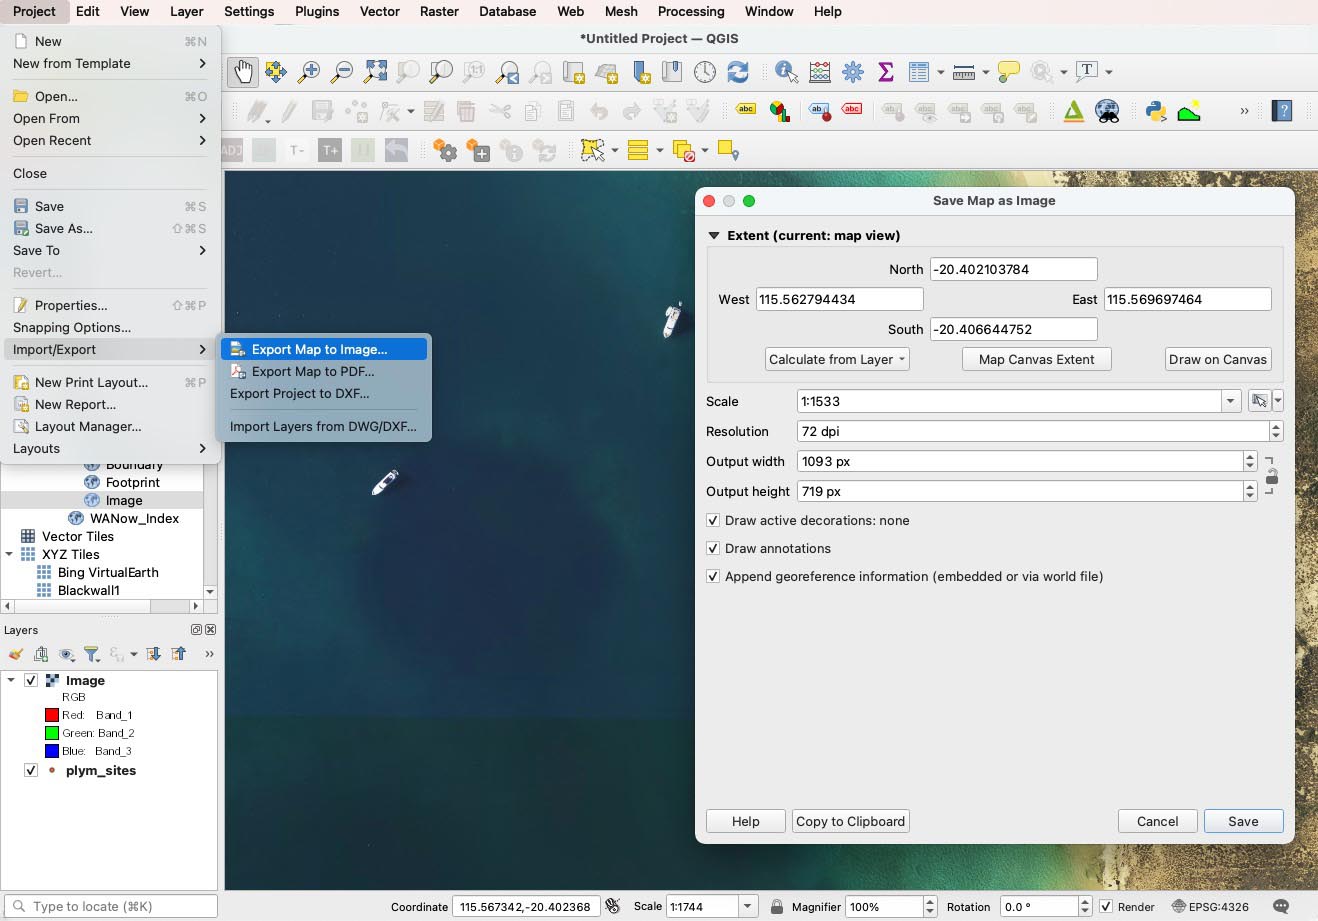
Step 2. Export as a geotiff
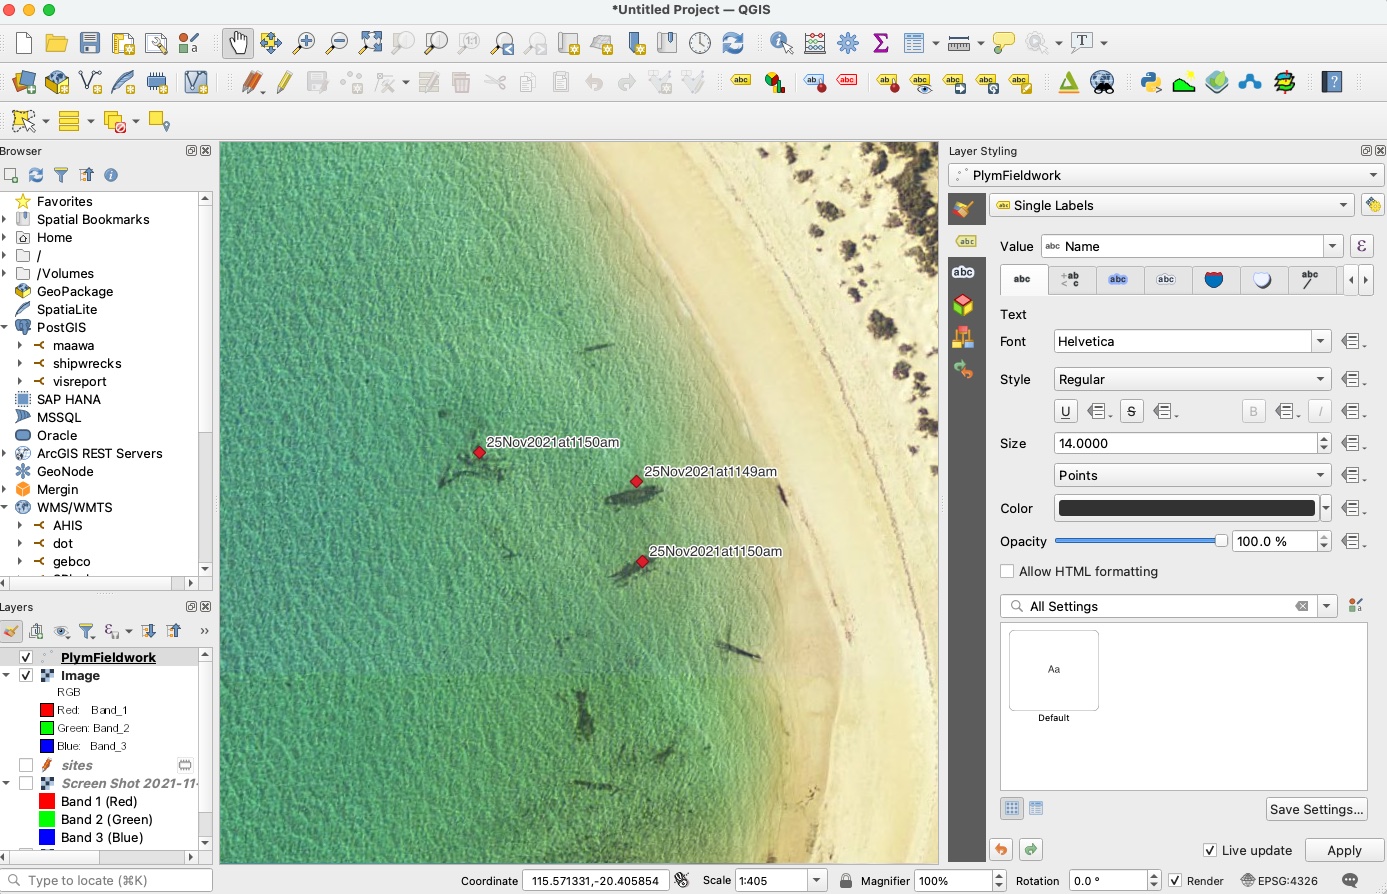
You will need to export the map canvas as a geotiff. Here I am exporting WANow from Landgate, because it clearly shows the nuclear crater. Here is the result. We will convert this into a *.kmz in the next step.
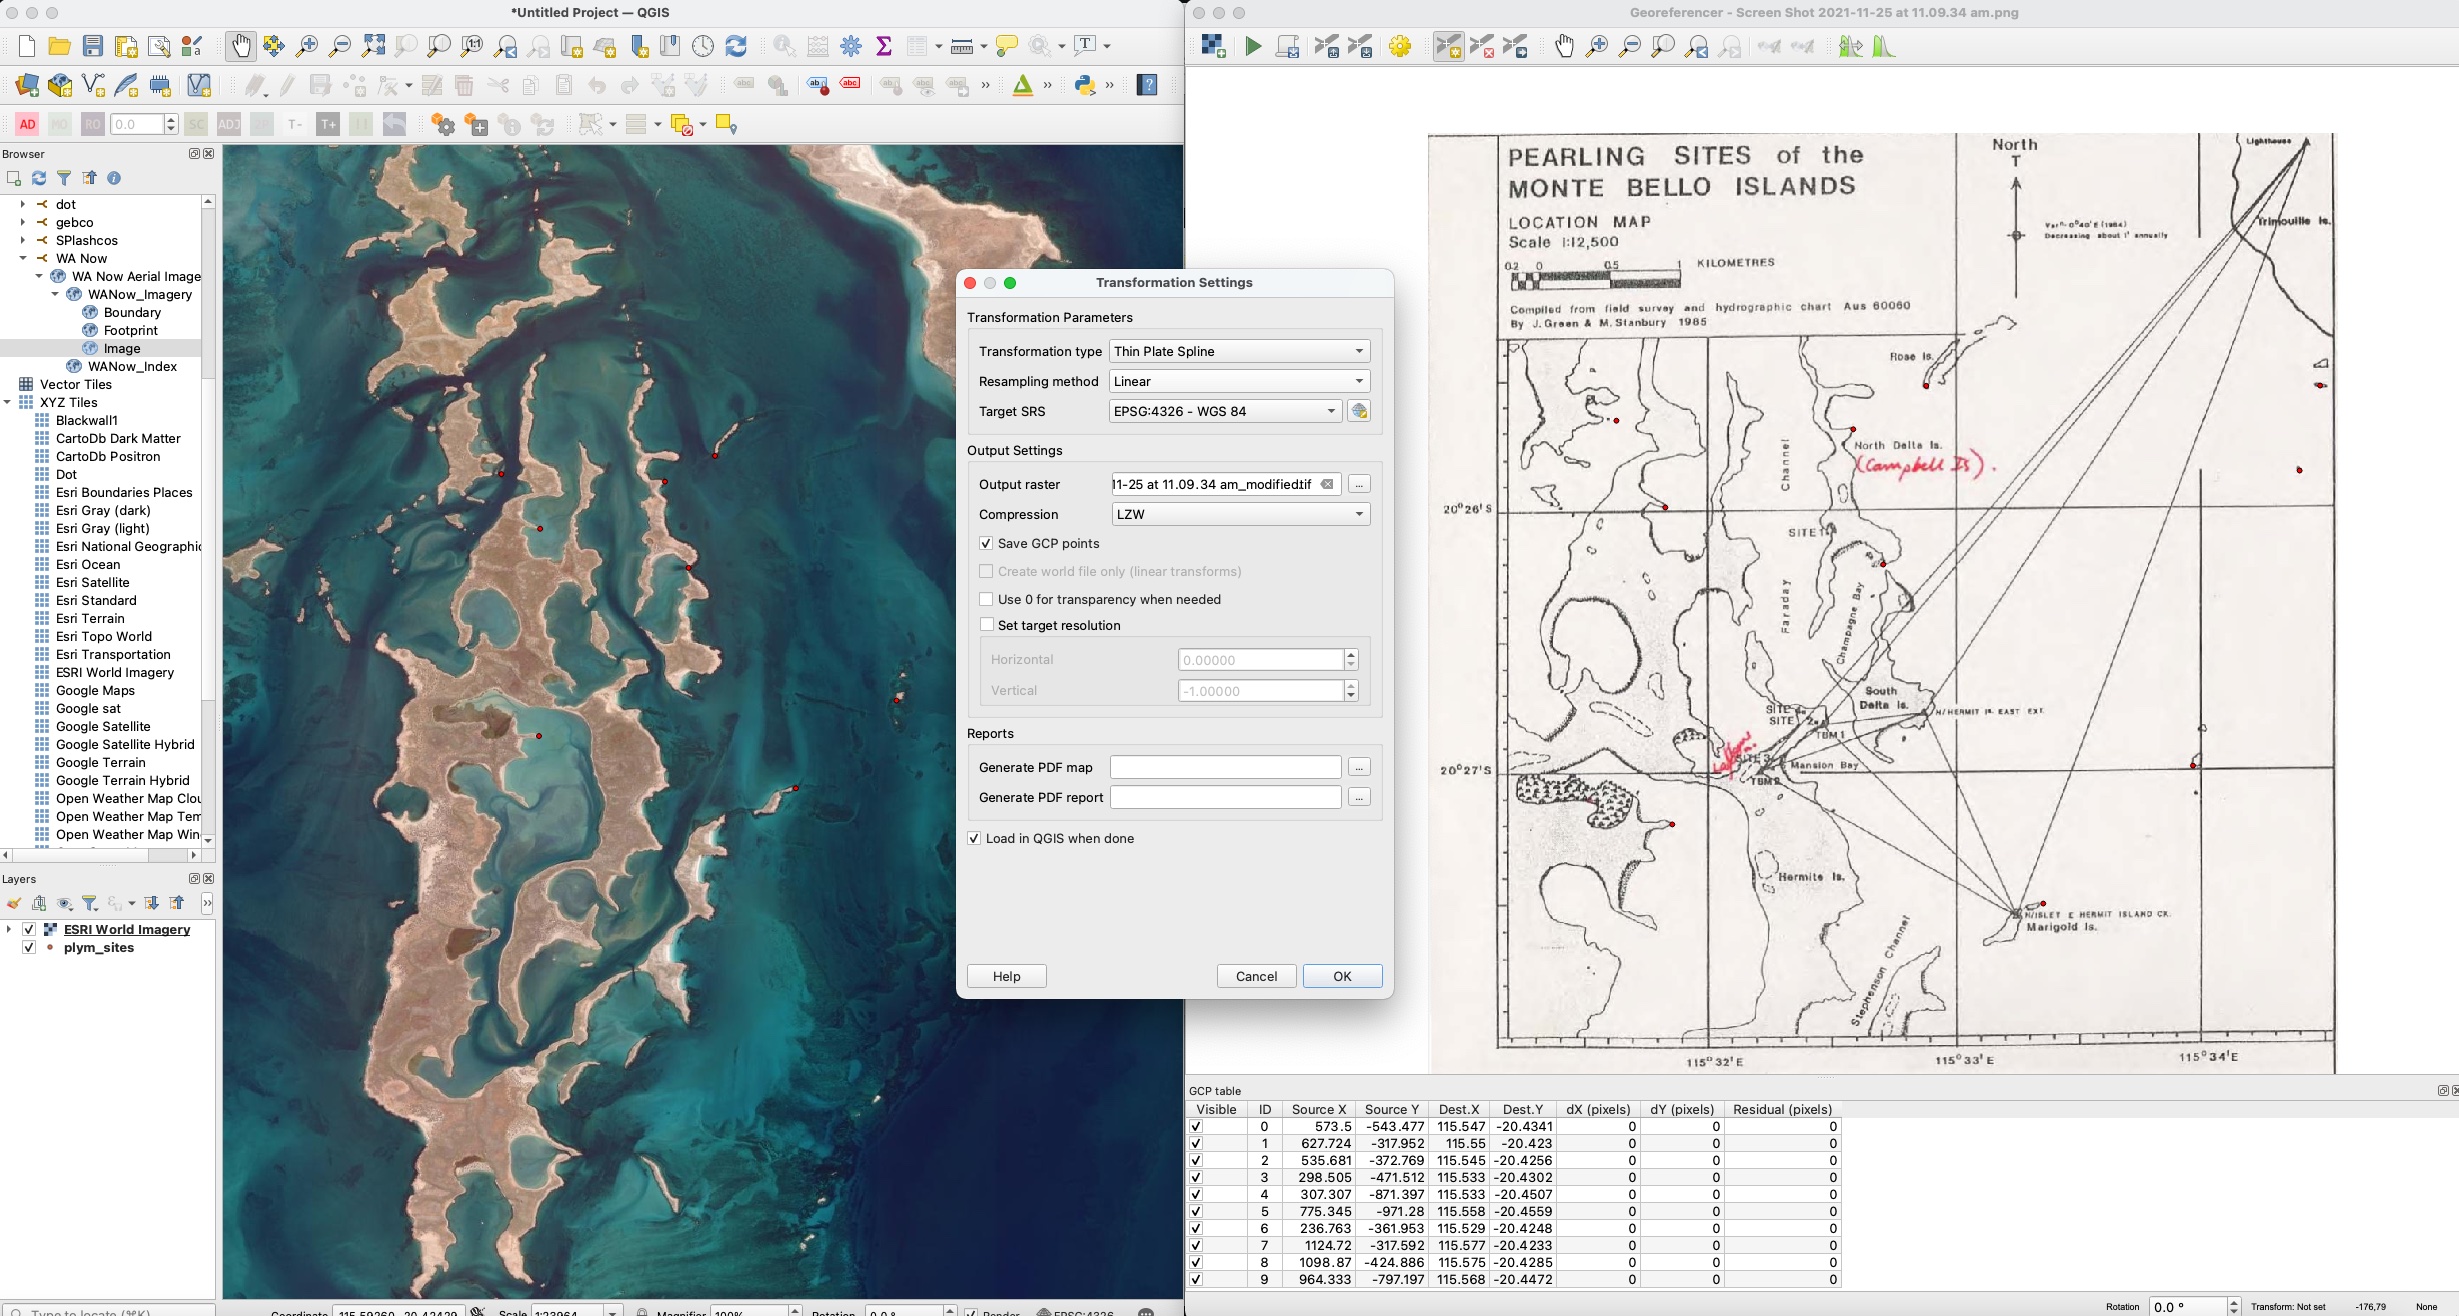
Georeferencing historical maps:
Often you will have historical maps which need to be ‘georeferenced’. There is a full tutorial on the QGIS manual. But the short version is:
open Georeferencer in the raster menu.
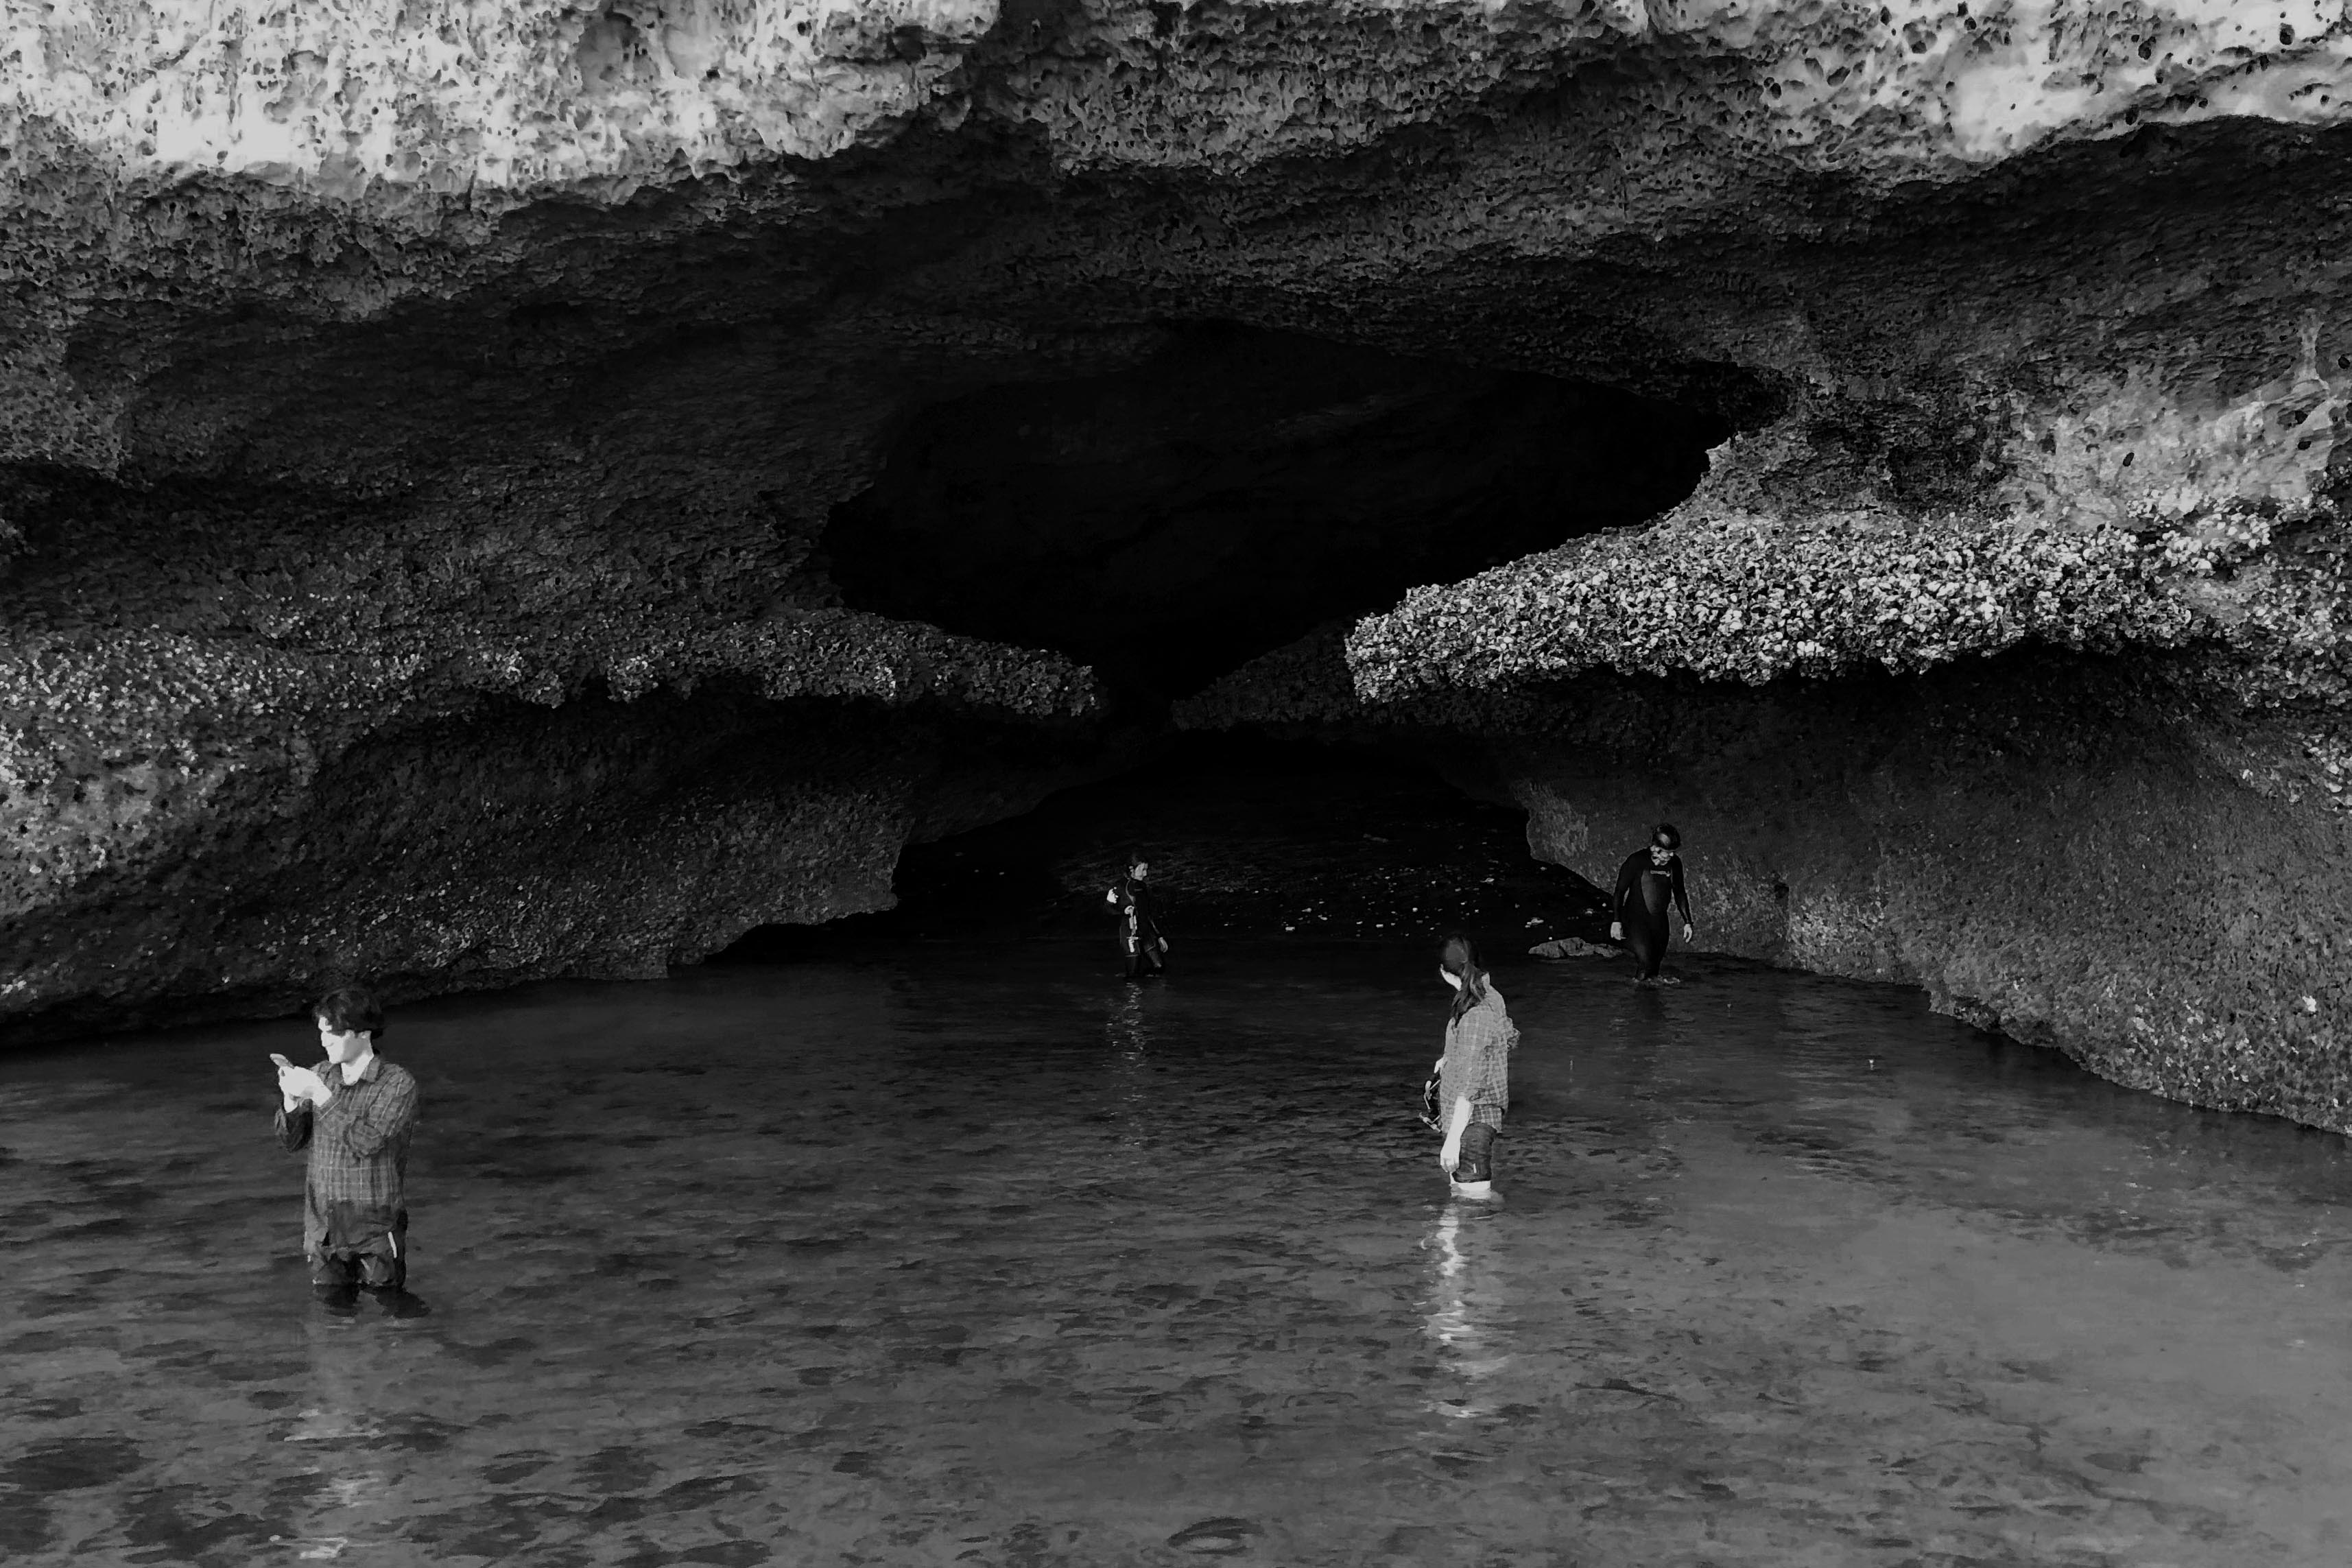
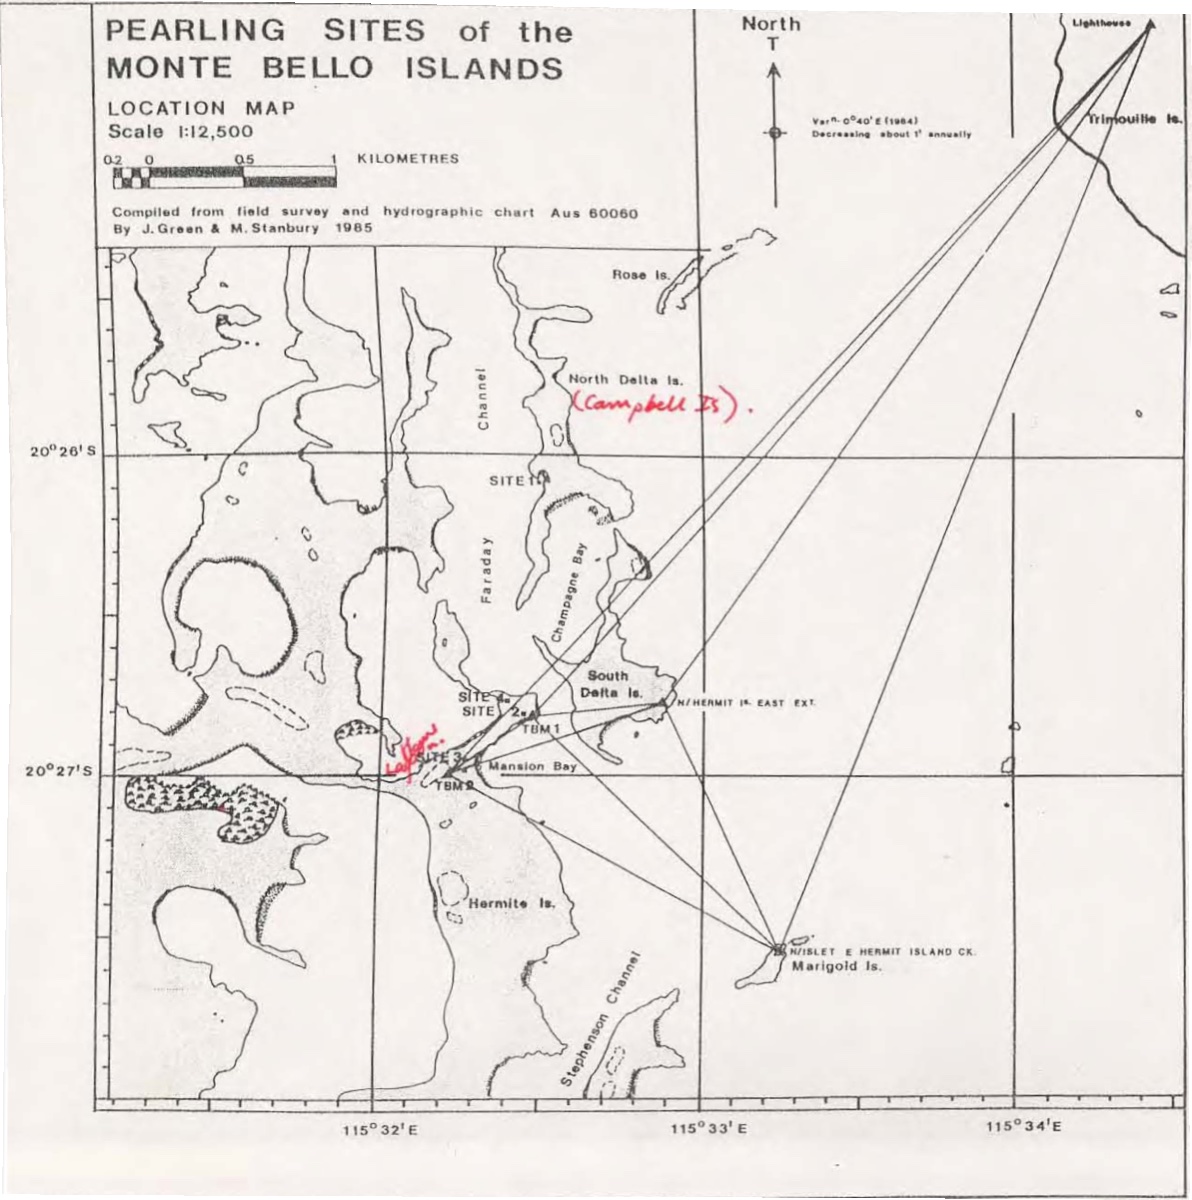
Load in an image, such as this screenshot of a hand drawn map of pearling sites, published in a WA Museum report.
click points and match them to those on the satellite map.
Use the golden cog to define the settings (see image), and hit the play button to generate a geotiff.
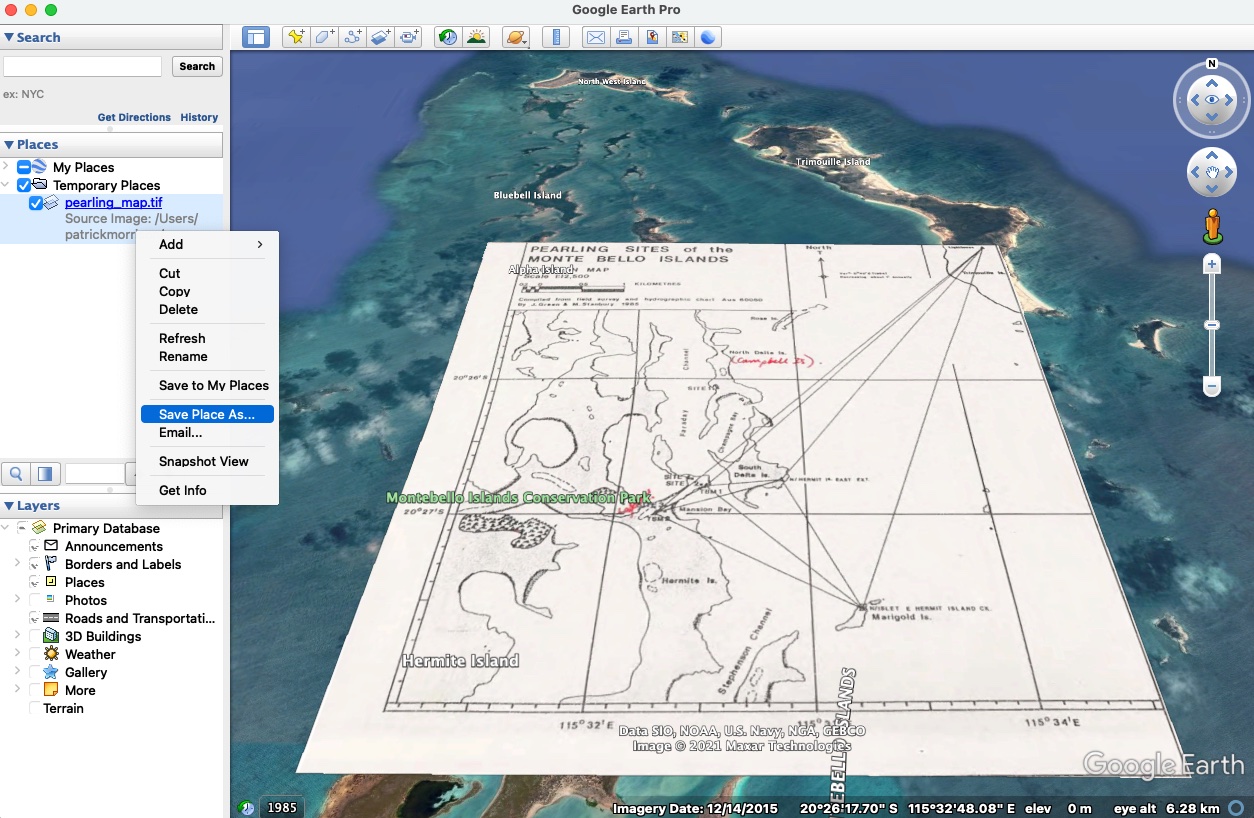
Convert to *.kmz using Google Earth Pro
You will need to download (the now free) Google Earth Pro onto your computer. Once you have it open, drag in your georeferenced *.tif file. It may tell you the file is too large, in which case choose the option to scale the image down. Once it is imported, locate it in the ‘My places’ pane to the left of the screen, then right click and select ‘Save Place As…’. Save as a *.kmz.
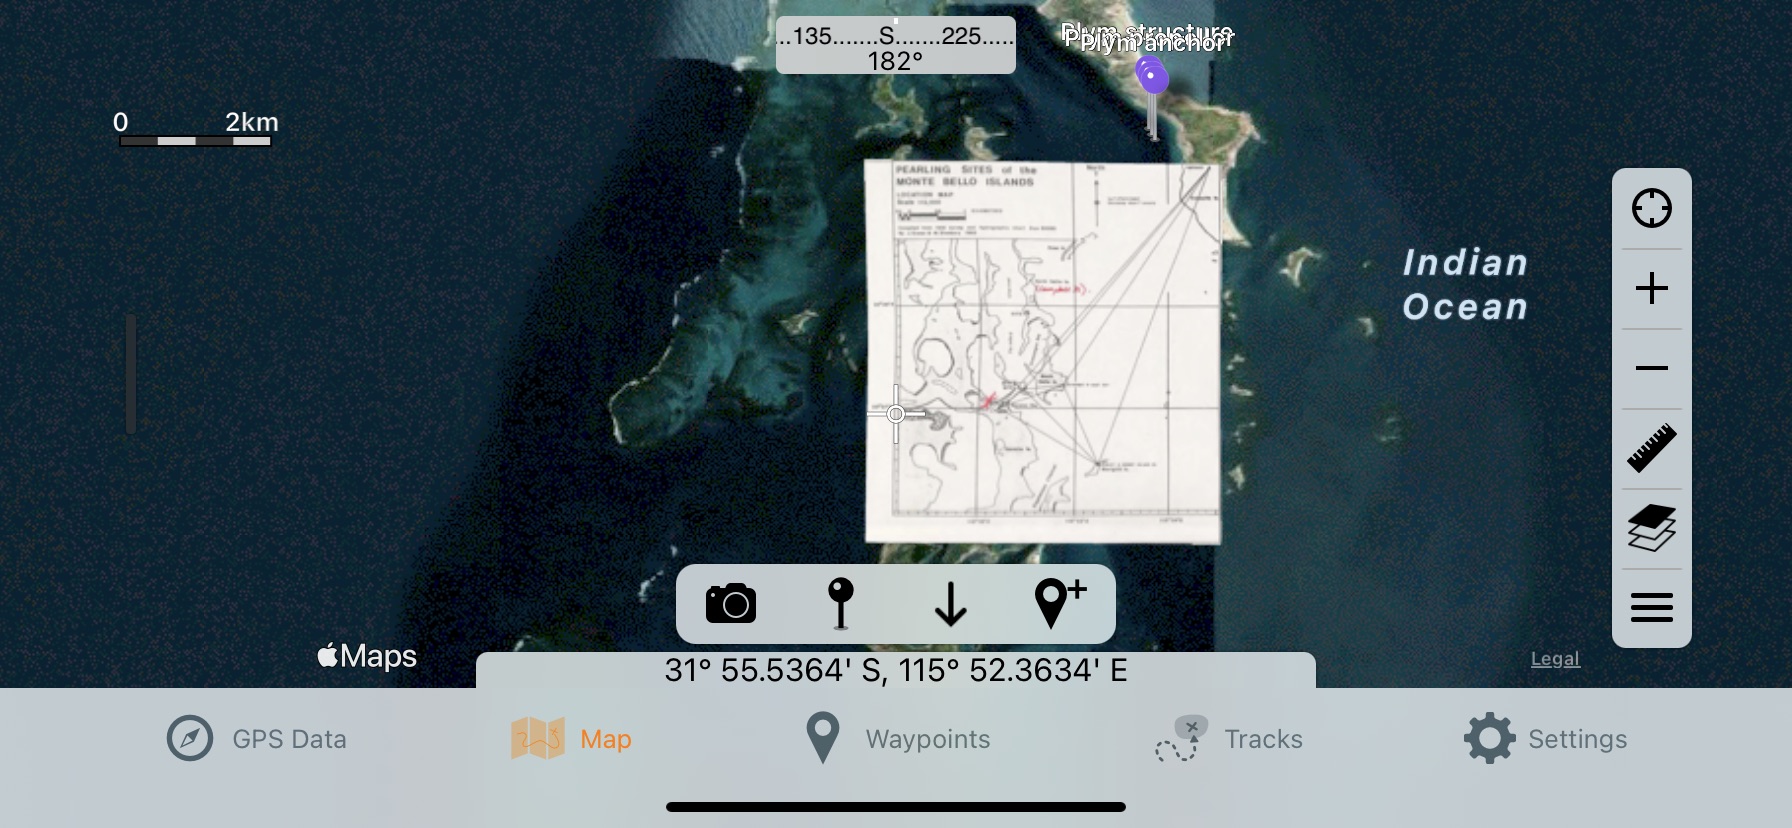
You should then be able to AirDrop/transfer it directly into GPS Tracks in the same way as point data:
Getting points from rasters
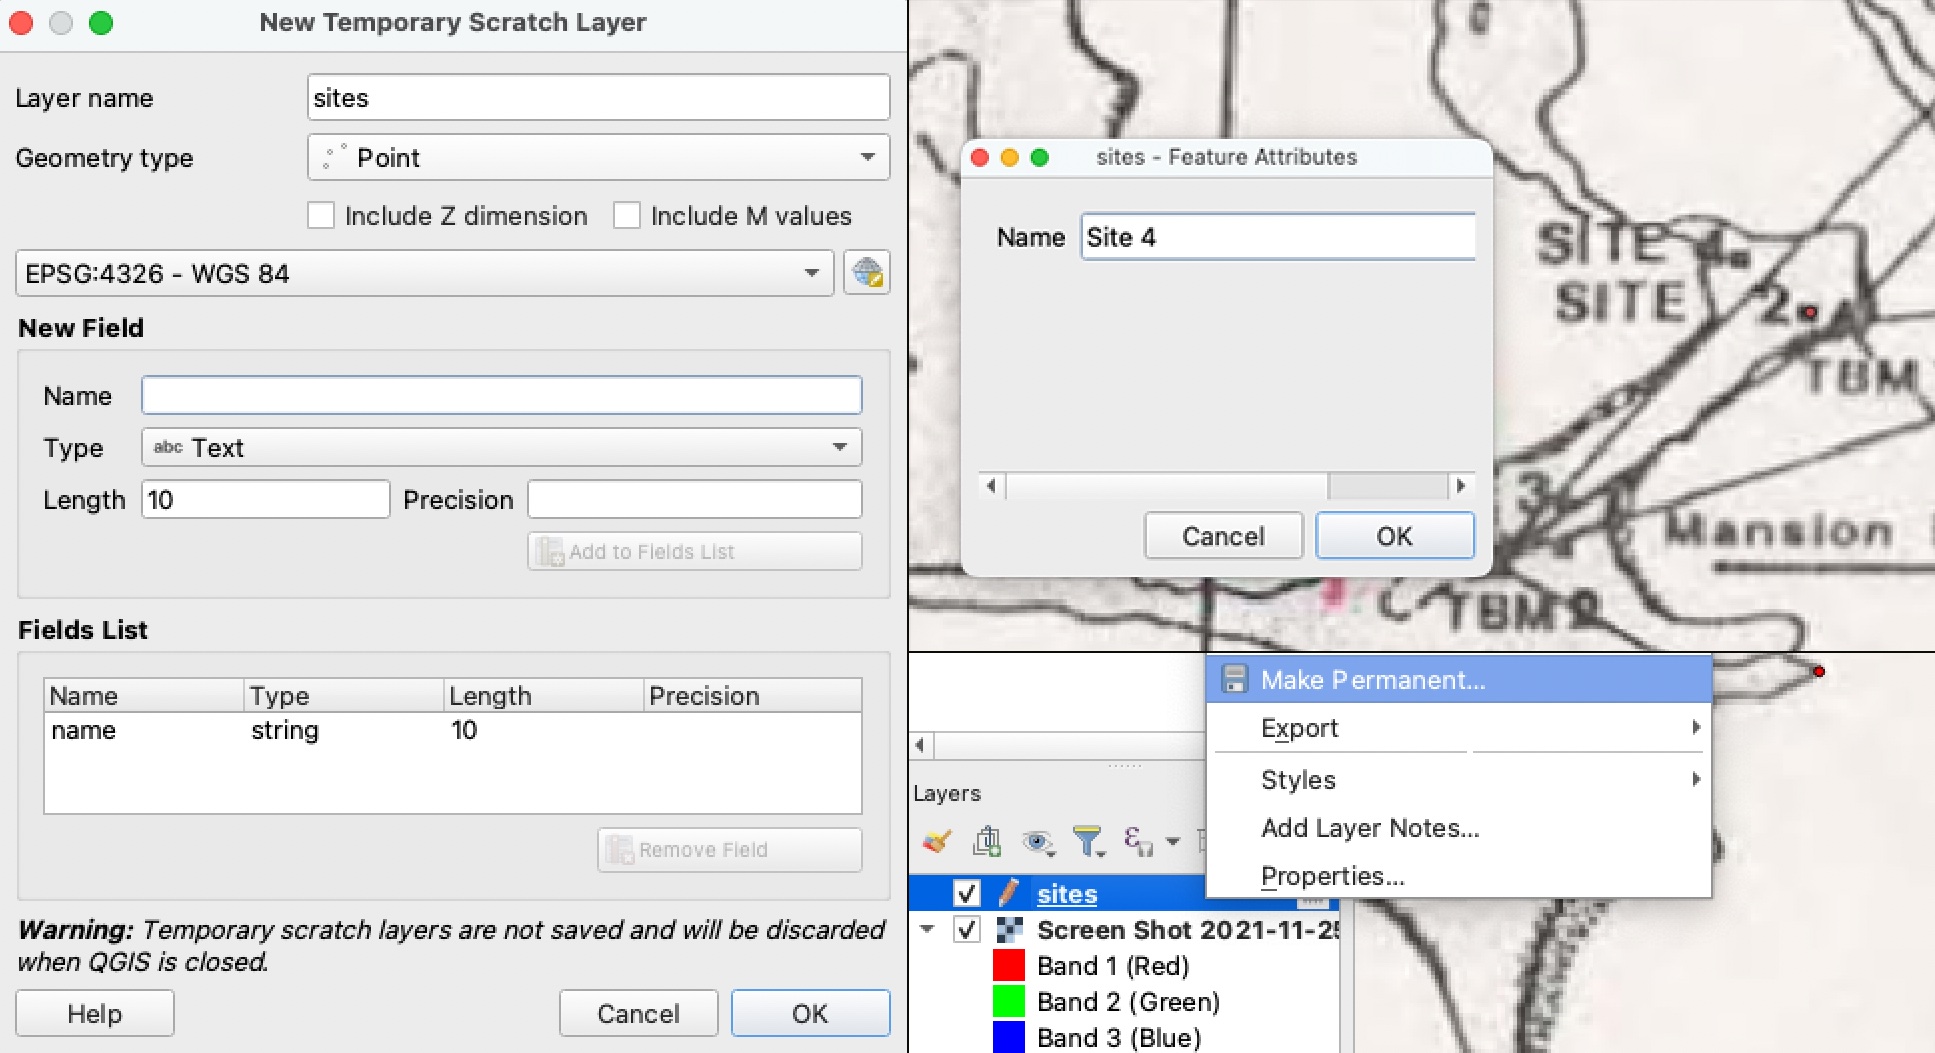
Lastly, you can combine these two approaches by creating point data from georeferenced images. Create a temporary scratch layer, and add a text field called ‘name’ to the fields list. With editing enabled (the pencil in the top tray menu), you can click on the map to add points. Once you are done, right click on the layer and make it permanent. As long as you save this as a *.kml as before, you can load it in like any another point data.
Recording points in the field
When you are in the field, you can record track logs and waypoints into GPS Tracks. If you export them as a KML or CSV, you are able to import them directly back into QGIS.
Drag it back into the canvas, open the layer styling panel in the View menu, and style it. Finally, open the print layout window (⌘P), add a scale bar, and export your image. I go into a bit more detail about this in another post.